Quick answer
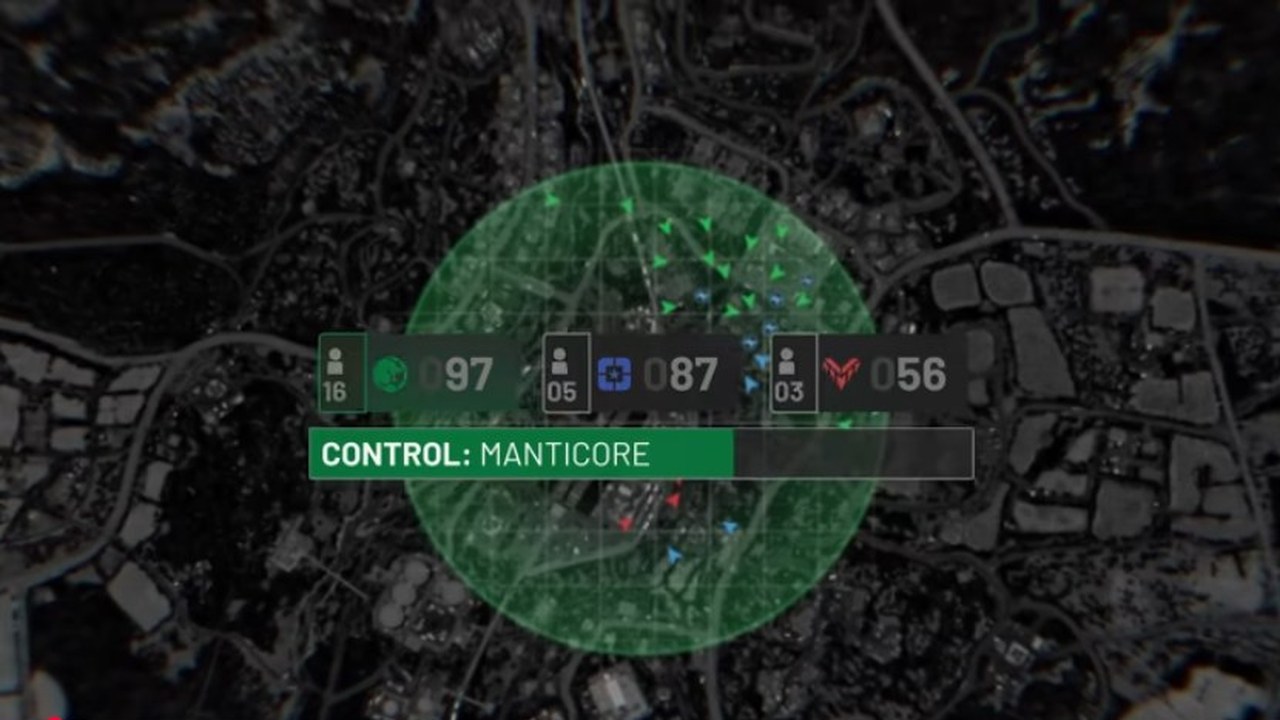
WARDOGS is won through Control Zone presence, not raw kill count. Up to 100 players split across Valkyra, Lonestar, and Manticore fight over a randomized 2 km by 2 km objective area. Every 30 seconds, the faction with the strongest presence inside the zone gains one point. The first team to 100 points wins.
What should I watch first?
Watch the zone boundary, the scoring timer, and the third faction. A kill matters when it changes who can stand in the objective at the next check. A transport run matters when it returns more players to the area before the timer fires. A defensive build matters when it keeps bodies alive long enough to count.
The three-team setup is the part that changes normal objective reading. If two factions are locked in a visible fight, the third faction can win by entering from another route, cutting reinforcements, or simply placing more players in the zone while the other two trade losses.
How should a beginner play the objective?
Use this first-match rule: ask whether your current action increases your team's next scoring count.
| Action | When it helps |
|---|---|
| Enter the zone | Your team needs direct presence before the next count. |
| Hold a flank | Enemy players are about to enter the scoring area. |
| Revive or heal | A teammate can stay alive and keep counting. |
| Drive transport | Players are too far from the objective to matter. |
Control Zone articles
| Question | Page |
|---|---|
| How should I approach and hold the zone? | Control Zones guide |
| What do towers and terminals change? | Towers and terminals |
| How does the Hot Zone change the count? | Hot Zone |
| Build cover | Your squad can hold the area through the timer. |
| Leave the zone | You are protecting a route, vehicle, or support job that keeps others inside. |
Where does the Hot Zone fit?
The Hot Zone is not a separate win condition. It is a smaller shifting area inside the main objective where player weight and cash rewards are higher. A small group in the Hot Zone can change the weighted count, but they can also attract pressure from all three teams.
If you are new, treat the Hot Zone as a calculated push rather than free value. It is strongest when your squad can enter together, survive the timing window, and still understand what the rest of the Control Zone is doing.
Where do towers and terminals fit?
Closed Beta guides describe towers as a way to change where the Hot Zone fight happens. Capturing a tower terminal reveals a code digit; combining the digits and entering the code at a selected tower pulls the Hot Zone toward that position for a limited window.
That makes towers a setup objective, not an automatic replacement for Control Zone presence. Collect the digits, communicate them, prepare the destination, and then convert the moved Hot Zone into weighted presence. See Towers and terminals for the full beta-observed sequence and current-build caveats.
Practical read
Use the score timer as your decision point: build presence first, spend for the current push, and treat kills as a way to change the next count.
Objective reading cues
Control Zone play is more than running to the marker. The zone creates a decision stack:
| Read | Decision |
|---|---|
| Is the next count close? | Put bodies, revives, and cover before side fights. |
| Is the Hot Zone open? | Send a prepared group, not a scattered trickle. |
| Is transport late? | Buy or call a vehicle before the squad misses the scoring window. |
| Is the third faction quiet? | Watch the flank and reinforcement route before overcommitting. |
| Is cash getting thin? | Use a cheaper repeatable kit until the team stabilizes. |
Sources
- WARDOGS on Steam for the official Control Zone, 100-player, three-team, and Cash framing.
- WARDOGS - Everything You Need to Know Before Playing for beta-observed scoring, Hot Zone, and tower details.